Scooter'ınız öldü ve pilleri değiştirmeniz gerekiyor. Kendiniz yapmak riskli hissediyor ve bir hata pahalı olabilir. Süreç boyunca size güvenli bir şekilde rehberlik edeceğim.
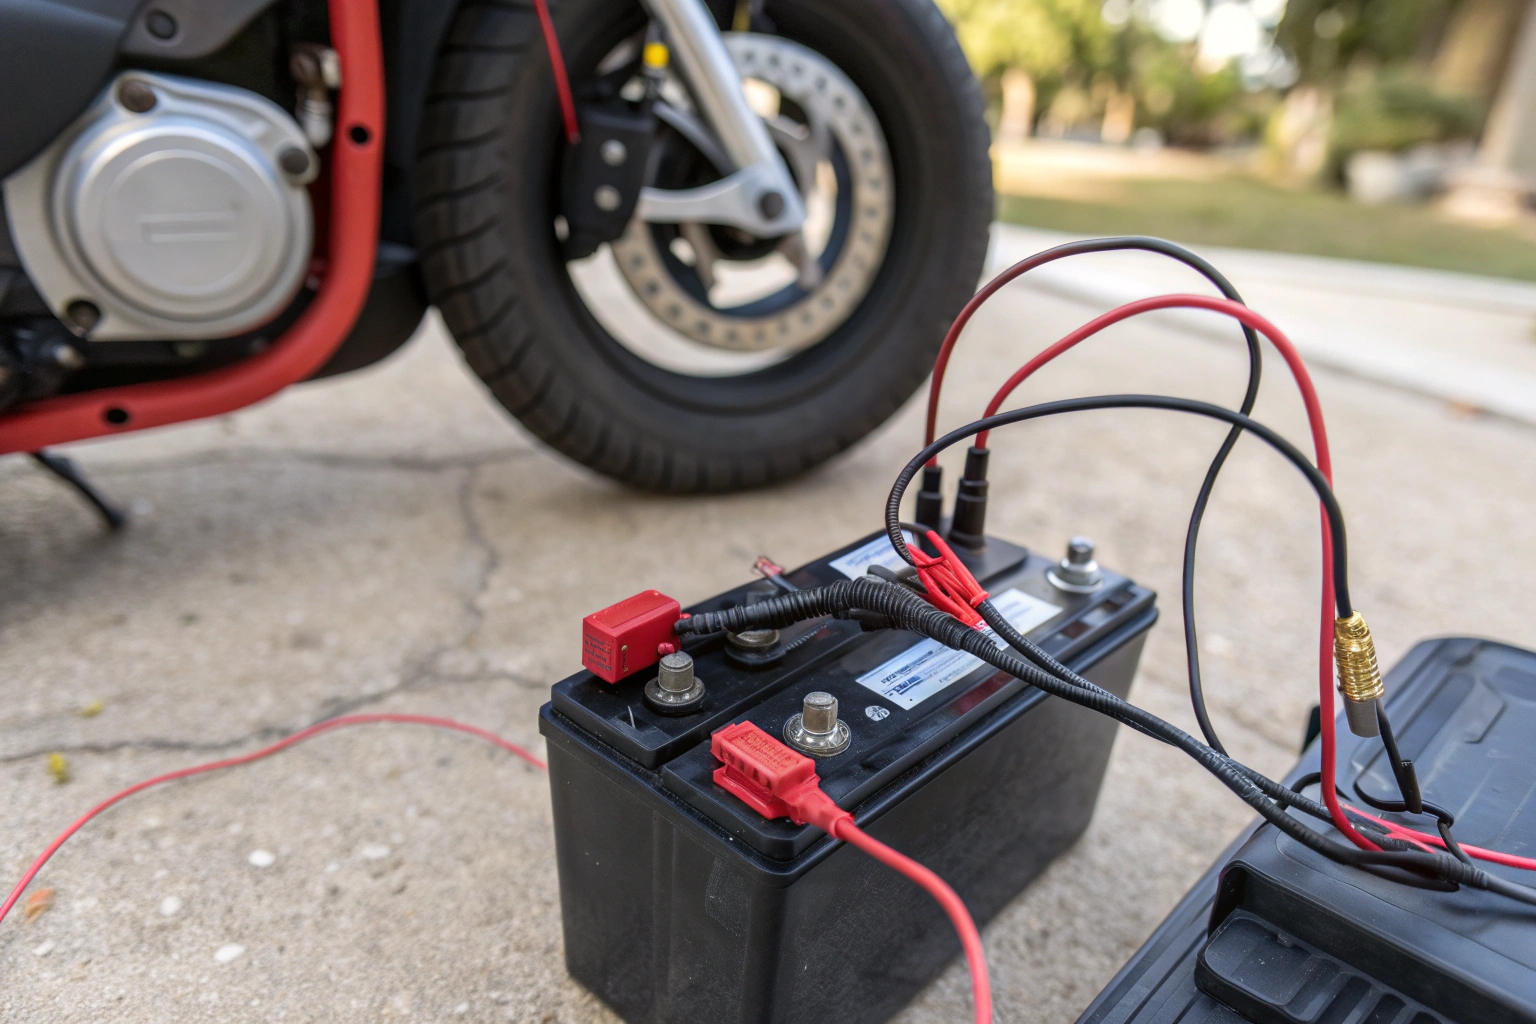
Scooter pilleri güvenli bir şekilde değiştirmek için her zaman gücü kapatın ve önce anahtarı kaldırın. Ardından, eski pillerin bağlantısını kesin (önce negatif), yenilerini takın ve pozitif-pozitif (kırmızı) ve negatif-negatif (siyah) bağlayın ve tüm bağlantıların sıkı olmasını sağlayın.
Bu, herhangi bir hareketlilik scooter için en yaygın bakım işlerinden biridir. Birkaç yıl sonra, piller eskisi gibi bir şarj tutmuyor. Fabrikamda, scooterlarımızı bu işlemin mümkün olduğunca basit olacak şekilde tasarlıyoruz. Birçok kişi scooter'larını bir satıcıya götürürken, bu kesinlikle evde yapabileceğiniz bir iştir. Sadece dikkatli olmanız ve adımları doğru sırayla takip etmeniz gerekir. Yanlış yapmak tehlikeli ve maliyetli olabilir, ancak doğru yapmak basittir ve size para kazandırır.
Hangi araçlar ve güvenlik adımları gereklidir?
İşi başlatmak istiyorsunuz, ancak neye ihtiyacınız olduğundan emin değilsiniz. Yanlış araçları veya güvenlik adımlarını atlamak kırık bir scooter veya hatta elektrik şokuna yol açabilir.
Sadece temel aletlere ihtiyacınız var: bir tornavida ve anahtar. En önemli güvenlik adımları, tüm gücü kapatmak, anahtarı kaldırmak ve herhangi bir şeye dokunmadan önce eldiven giymektir.
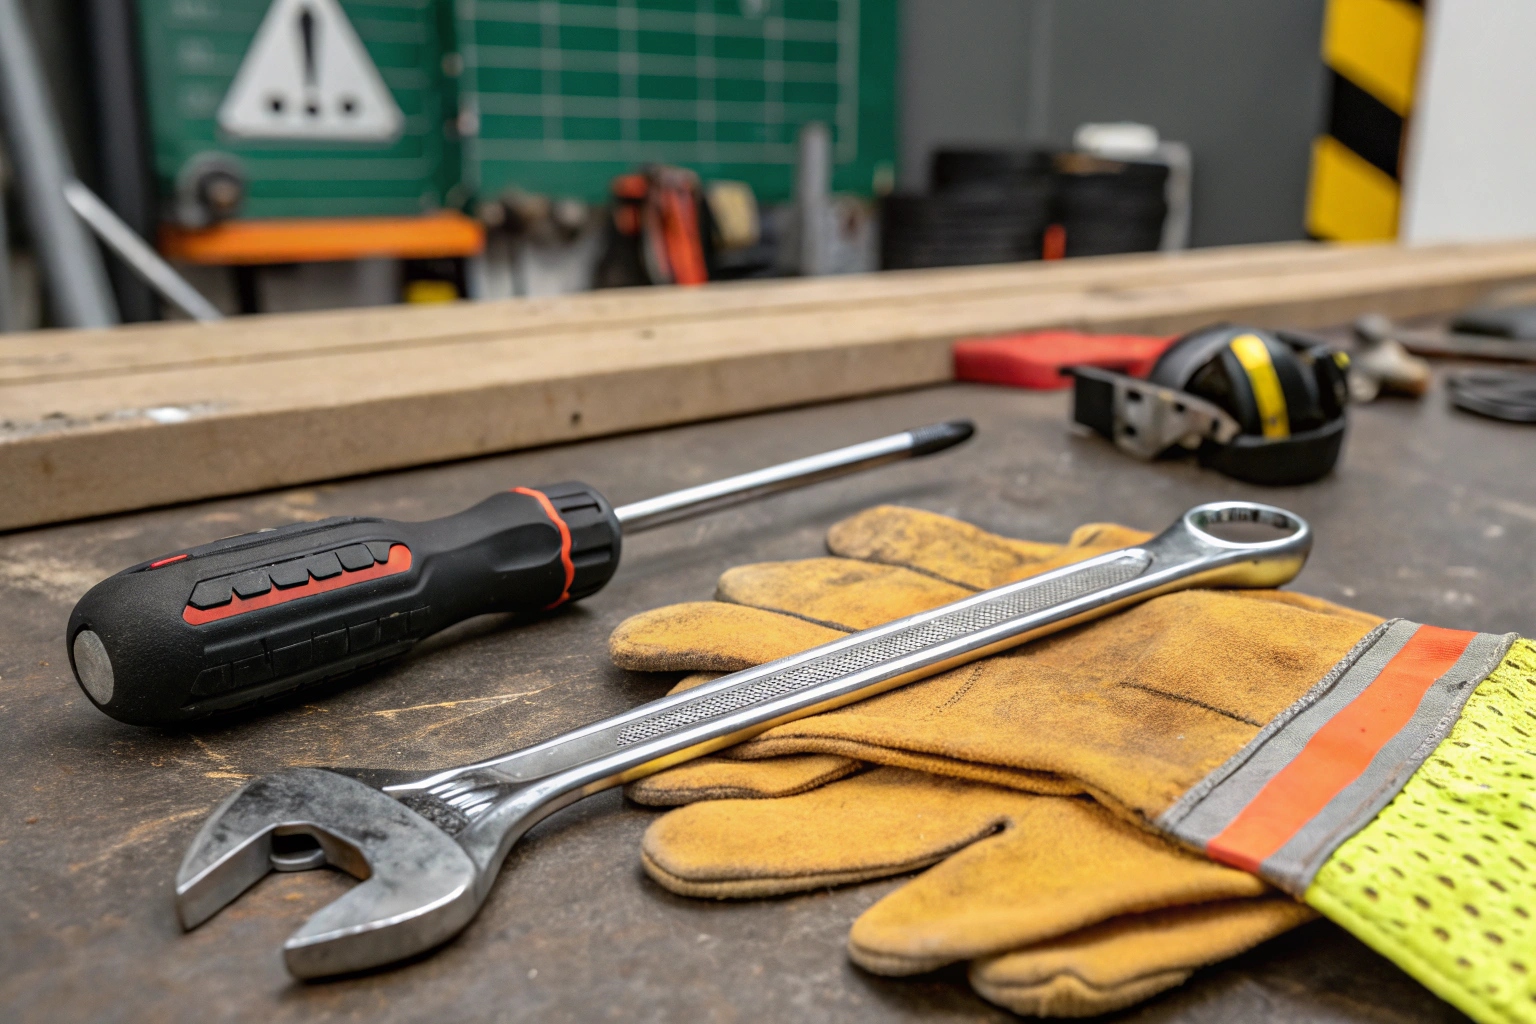
Bu iş için profesyonel bir tamircinin araç kutusuna ihtiyacınız yok. Araçlarımızı basit el aletleriyle servis edilecek şekilde tasarlıyoruz. Buradaki öncelik, araçların karmaşıklığı değil, sürecin güvenliğidir. A Pil çok fazla enerji depolarve buna saygı duymalısın. Yanlışlıkla yanlış iki yere dokunan küçük bir metal alet, büyük bir kıvılcım ve kısa devre yaratabilir. Bu yüzden güvenli bir operasyon sırasını takip etmek çok önemlidir.
İşte tüm yeni teknisyenlerimize öğrettiğim kesin adımlar:
- Tamamen güç: Scooter'ın güç anahtarını kapatın ve en önemlisi Anahtarı kontaktan çıkarın. Bu, üzerinde çalışırken sistemin yanlışlıkla açılma şansını önler.
- İyi bir alanda çalışın: İyi aydınlatılmış ve kuru bir alanda olduğunuzdan emin olun.
- Eldiven giy: Basit iş eldivenleri ellerinizi kir ve kirten koruyacaktır.
- Take a "Before" Picture: Tek bir kabloyu ayırmadan önce, pil kurulumunun net bir resmini çekmek için telefonunuzu kullanın. Bu fotoğraf, yeni pillerin nasıl bağlanacağına dair mükemmel rehber olacak. Kitaptaki en yararlı numara.
Pil terminalleri ve bağlantıları nasıl tanımlanır?
Tüm kırmızı ve siyah teller kafa karıştırıcı görünüyor. Onları yanlış bir şekilde bağlamak büyük bir endişe, ancak takip etmek için basit bir sistem var, böylece yanlış anlayamazsınız.
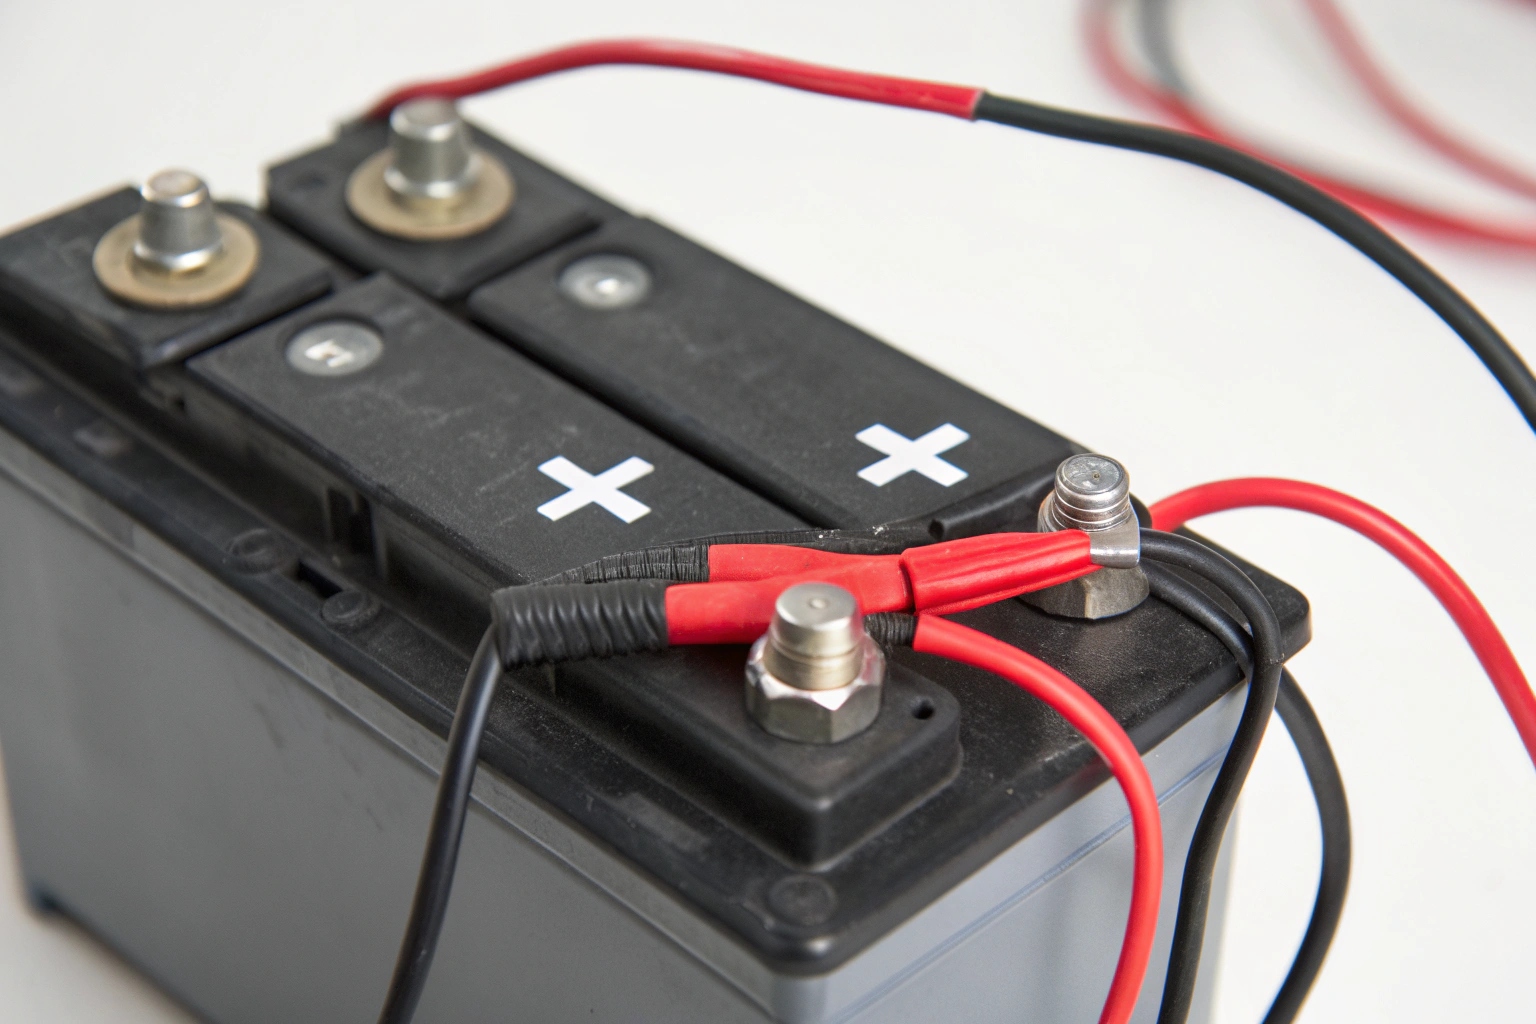
Pil terminalleri pozitif için bir artı (+) ve negatif için eksi (-) ile işaretlenir. Teller renk kodludur: kırmızı pozitif ve siyah negatiftir. Sadece renkleri eşleştirin.
Burası insanların en gerginliği aldığı yerdir, ancak aslında çok basittir. Tüm endüstri hataları önlemek için standart bir renk kodu kullanır. İşiniz sadece renkleri ve sembolleri eşleştirmektir. Kafası karıştırmak imkansızdır.
- Pilde: Pillerinizin üstüne bakın. İki yazı veya terminal göreceksiniz. Birine sahip olacak
+yanındaki plastik kasaya kalıplanmış sembol. Bu Olumlu terminal. Çoğu zaman üzerinde kırmızı plastik bir kapak olacaktır. Diğer terminalde-sembol. Bu Negatif terminal ve genellikle siyah bir kapağı vardır. - Scooter'ın kablolarında: Scooter'ınızdan gelen teller aynı renk kodunu takip edecektir. . Kırmızı tel Pozitif (+) terminaline bağlanmalıdır. . Siyah tel Negatif (-) terminaline bağlanmalıdır.
The "Jumper" Cable
You will also see a short cable connecting the two batteries to each other. This is what links the two 12V batteries to create the 24V your scooter needs. Don't worry about this cable. Your "before" picture will show you exactly how it connects. When you put the new batteries in, just connect this jumper cable first, exactly as it was in the photo.
| Tel/terminal rengi | Sembol | Bağlanır |
|---|---|---|
| Kırmızı | + |
Olumlu terminal |
| Siyah | - |
Negatif terminal |
Farklı scooter modellerinde piller nasıl değiştirilir?
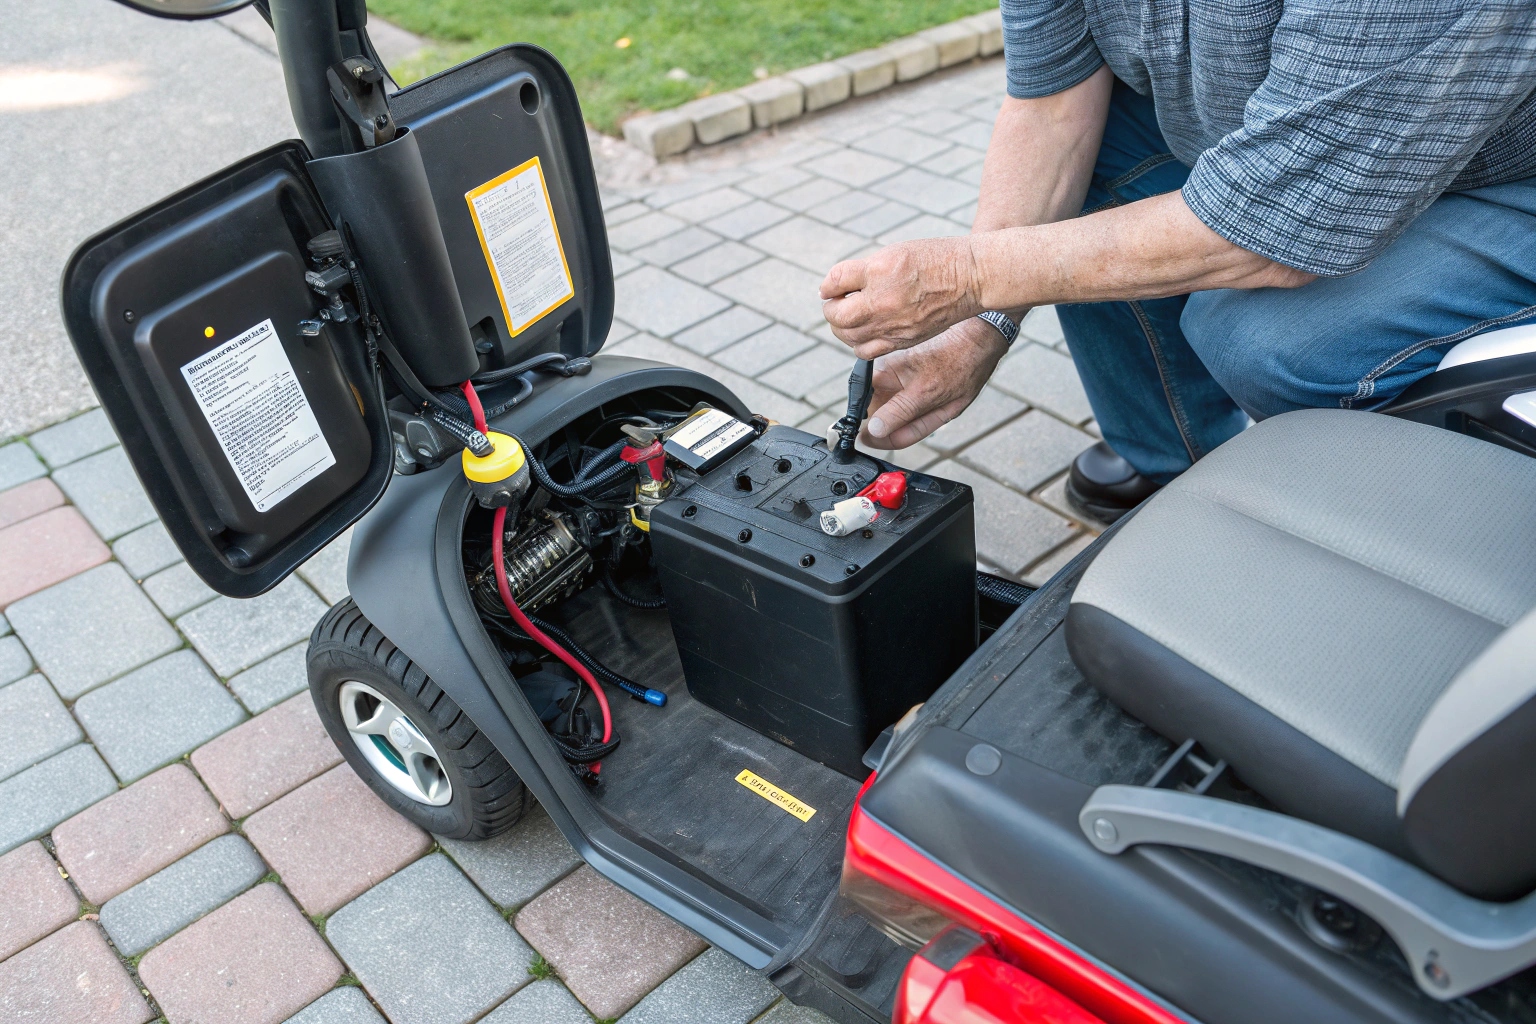
Scooter'ınızı açtınız, ancak çevrimiçi resimlere benzemiyor. Pilleri bulmak ve onları dışarı çıkarmak imkansız görünüyor. Genellikle iki yoldan biridir.
Piller ya çıkarılabilir bir pakette (seyahat scooter'larında yaygın) veya koltuğun altındaki plastik bir kapağın altında (daha büyük modellerde). Paket kaldırılırken, kapak sömürülmelidir.
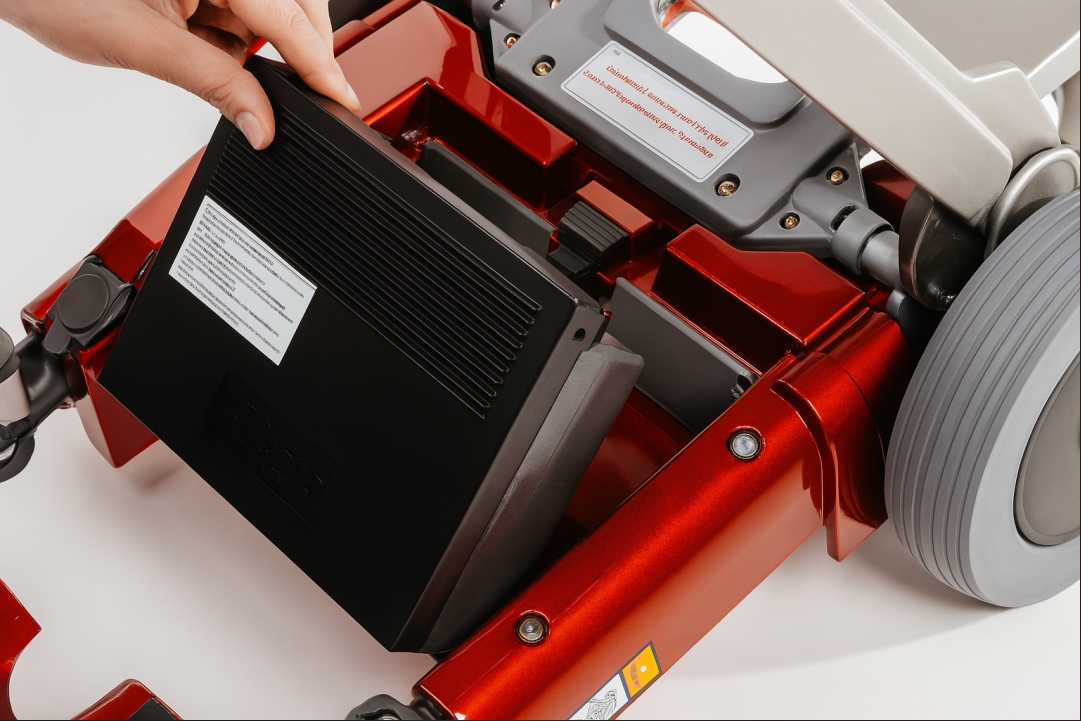
Yüzlerce scooter modeli olsa da, üreticiler genellikle pilleri iki ana konumdan birine yerleştiriyoruz. Değiştirme yöntemi her biri için biraz farklıdır, ancak prensip aynıdır.
Seyahat / Katlanır Scooterlar için (Çıkarılabilir Paket)
Bunlar taşınabilirlik için tasarlanmıştır, bu nedenle pil sistemi kolayca çıkarılır.
- Paketi bulun: Genellikle scooter'ın döşeme tahtasında oturan, genellikle bir sapla tek bir siyah plastik kutudur.
- Kaldır: Genellikle basit bir mandal vardır veya sadece scooter'dan yukarı ve dışarı kaldırır.
- Birim olarak değiştirin: Bu modeller için tipik olarak yeni, yeni bir pil paketi satın alırsınız. Yeni paketi eskisinin bulunduğu yere bırakıyorsunuz. Bazen bu paketi açabilir ve içindeki iki küçük pili değiştirebilirsiniz, ancak çoğu insan tüm üniteyi değiştirir.
Orta boy ve büyük scooterlar için (koltuğun altında)
Bu daha sağlam modellerde, piller scooter'ın stabilite için ana çerçevesinin bir parçasıdır.
- Koltuğu çıkarın: Koltuk genellikle montaj direğinden yukarı ve dışarı kaldırılır.
- Örtüyü kaldır: Scooter'ın arka bölümünde büyük bir plastik kapak göreceksiniz. Bu örtü. Birkaç vida veya Velcro sekmesi ile yerinde tutulabilir. Dikkatlice çıkarın.
- Pillere erişin: Altında, şimdi kablolarla bağlanmış ve kablolarla bağlanan iki 12V pili açıkça göreceksiniz. Burası onları bağlantıyı kesmeye başlayacaksınız.
Pilleri takarken kaçınılması gereken yaygın hatalar nelerdir?
Yeni pilleri hazırladınız. Basit bir kayma artık yeni pillerinizi veya scooter'ın elektroniklerini yok edebilir. Küçük bir hatanın büyük bir maliyet haline gelmesine izin vermeyin.
En büyük tek hata, pilleri geriye doğru bağlamaktır (tersine dönen kutuplığını). Bu, scooter'ın denetleyicisini anında yakabilir. Daima kırmızı pozitif (+) ve siyah ila negatif (-) bağlayın.
Bu, tüm işin en kritik kısmıdır. Önceki tüm adımlar şu ana yol açıyor. Uluslararası ithalatçılarımız için servis ekiplerini eğittiğimde, bu noktada her şeyden daha fazla zaman harcıyorum. Bir polarite ile bir polarite ile birleştirmek, bir saniye bile tersine çevrilmiş, elektrik akışını scooter'ınızın hassas elektronik beyninden yanlış şekilde aktarır.
Kırmızı teli negatif terminale bağlarsanız ne olur:
- Anında Elektronik Hasar: You will likely hear a "pop." That is the sound of your scooter's controller—its most expensive electronic part—burning out. It can also destroy the charger port and other components.
- Üflemeli sigortalar: En iyi ihtimalle, buna karşı korumak için tasarlanmış ana sigortayı üfleyeceksiniz. Ancak çoğu zaman, sigorta tepki vermeden önce hasar yapılır.
- Yıkık Yeni Piller: Polariteyi tersine çevirmek, yeni aldığınız yeni pillere kalıcı olarak zarar verebilir, ömrünü azaltabilir veya onları tamamen öldürebilir.
- Yangın tehlikesi: En kötü senaryoda, bu, kabloları eritebilen ve ciddi bir ateş riski oluşturabilen büyük bir kısa devre oluşturur.
Diğer yaygın hatalar:
- Gevşek bağlantılar: Terminallerdeki somunları sıkılaştırmamak zayıf performansa ve kıvılcımlara yol açabilir. Onları rahat ettir.
- Soğuk: Tüm gücünüzü kullanmayın. Soğukluk plastiği kırabilir ve pil terminalini kırabilir.
- Forgetting your "Before" Picture: Kafanız karışırsanız, bu fotoğraf en iyi arkadaşın.
Çözüm
Scooter pilleri değiştirmek, dikkatli iseniz güvenli ve kolay bir iştir. Güç açın, bir fotoğraf çekin, renklerle eşleştirin ve çalışmanızı iki kez kontrol edin. Bu basit görev size paradan tasarruf edebilir.
